Worried about hidden cameras compromising your privacy? A radio frequency (RF) hidden camera detector can be your best friend. These devices are designed to locate cameras transmitting wirelessly, offering a degree of reassurance in both personal and professional settings. But how do they work, and how can you effectively use one? This comprehensive guide will walk you through the process step-by-step, providing you with the knowledge to confidently detect potentially intrusive devices.
Understanding RF Hidden Camera Detectors: The Basics

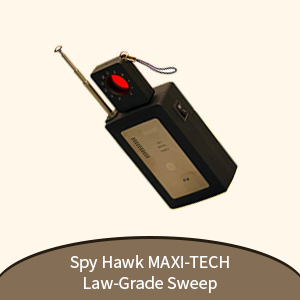
RF hidden camera detectors work by scanning for the radio frequencies commonly used by wireless cameras. These frequencies vary, but many operate on common wireless bands like 2.4 GHz and 5 GHz, the same used by Wi-Fi. The detector picks up these signals and alerts you to their presence through visual or audio cues – usually a flashing light and/or a beeping sound, the intensity of which often correlates with signal strength. This means the closer you get to the camera, the stronger the signal and the more pronounced the alert.
The sensitivity of these detectors varies significantly depending on the make and model. Higher-end detectors often boast greater range and sensitivity, picking up weaker signals from cameras further away or those using more sophisticated concealment techniques. Consider your needs – are you looking for a simple device for a small space, or a more robust detector for large areas?
Step-by-Step Guide to Using Your RF Hidden Camera Detector
- Preparation is Key: Before you start, power on your detector and ensure it’s fully charged. Understand its range and sensitivity limitations; these are usually specified in the device’s manual. Clear the area of any potential sources of interference like other electronic devices – microwaves, cordless phones, etc., as these can trigger false positives.
- Systematic Scanning: Begin your search systematically. Don’t rush! Slowly move the detector around the room, keeping a consistent distance (usually around 6-12 inches) from walls, furniture, and other potential hiding spots. Pay close attention to common locations for hidden cameras such as smoke detectors, clocks, picture frames, power outlets, and even everyday items that might be easily modified.
- Interpreting the Signals: When the detector alerts you, it’s time to investigate. Note the intensity of the signal – a strong, consistent alert usually indicates a camera is nearby. Try to pinpoint the exact source by slowly moving the detector in a grid pattern around the area where the alert is strongest.
- Visual Inspection: Once you’ve identified a potential location based on the detector’s readings, thoroughly inspect the area visually. Look for anything unusual, tiny lenses, or small wires that might indicate a hidden camera. Remember that cameras can be incredibly well-concealed, and sometimes only a careful examination will reveal them.
- Dealing with False Positives: Some interference is inevitable, so you might encounter false positives. If a signal is faint and inconsistent, it’s more likely interference. Try moving away from the area and see if the alert disappears. Re-check suspicious areas multiple times to confirm a genuine detection.
- Documentation and Further Action: If you locate a hidden camera, document its location and take photographs. Depending on your circumstances, you may need to inform relevant authorities or take legal action. In personal settings, this may simply involve removing the device.
Troubleshooting Common Issues

Even with careful use, you might encounter some issues. Here are some common problems and their solutions:
- Weak Signals: A weak or intermittent signal can indicate a camera is far away, heavily shielded, or operating at a low power level. Try increasing the detector’s sensitivity if possible, and carefully search the surrounding area.
- Many False Positives: Excessive interference can overwhelm your detector. Try turning off other electronic devices in the vicinity, moving to a quieter area, or using a more advanced detector with better filtering capabilities.
- No Signals Found: If you’re not detecting anything despite suspected cameras, ensure your detector is functioning correctly by checking its battery and trying it in a known area with a wireless device. The camera may use a different transmission technology not detected by your RF detector, or it could be a wired camera.
Choosing the Right RF Hidden Camera Detector
The market offers a wide range of detectors. Factors to consider include:
- Frequency Range: Ensure the detector covers the frequencies used by the cameras you suspect.
- Sensitivity: Higher sensitivity means greater range and the ability to detect weaker signals.
- Range: Consider the size of the area you need to cover.
- Features: Some detectors offer additional features like GPS location, laser pointers, or audio detection.
- Price: Prices range from budget-friendly options to more advanced, professional-grade detectors.
Beyond RF Detection: Additional Considerations

Remember, RF detectors are most effective against wireless cameras. Wired cameras and those using different transmission methods (like infrared) will not be detected. A comprehensive approach to privacy protection may involve visual inspections, checking for unusual wiring, and potentially using other detection methods.
This guide provides a comprehensive overview of how to effectively use an RF hidden camera detector. By following these steps and understanding the limitations and capabilities of your device, you can significantly enhance your ability to protect your privacy and security.


